- prerequisites
- Step 1. Clone ThingsBoard PE K8S scripts repository
- Step 2. Configure and create EKS cluster
- Step 3. Create AWS load-balancer controller
- Step 4. Amazon PostgreSQL DB Configuration
- Step 5. Upload Docker credentials
- Step 6. Installation
- Step 7. Configure secure HTTP connection
- Step 8. Configure secure MQTT connection
- Step 9. Starting
- Step 10. Using
- Upgrading
This guide will help you to set up ThingsBoard in monolith mode in AWS EKS.
Install and configure tools
To deploy ThingsBoard on EKS cluster you’ll need to install kubectl,
eksctl and
awscli tools.
Afterwards you need to configure Access Key, Secret Key and default region. To get Access and Secret keys please follow this guide. The default region should be the ID of the region where you’d like to deploy the cluster.
1
aws configure
Step 1. Clone ThingsBoard PE K8S scripts repository
1
2
git clone https://github.com/thingsboard/thingsboard-pe-k8s.git
cd thingsboard-pe-k8s/aws/monolith
Step 2. Configure and create EKS cluster
In the cluster.yml file you can find suggested cluster configuration.
Here are the fields you can change depending on your needs:
region- should be the AWS region where you want your cluster to be located (the default value isus-east-1)availabilityZones- should specify the exact IDs of the region’s availability zones (the default value is[us-east-1a,us-east-1b,us-east-1c])instanceType- the type of the instance with TB node (the default value ism5.xlarge)
Note: if you don’t make any changes to instanceType and desiredCapacity fields, the EKS will deploy 1 node of type m5.xlarge.
In case you want to secure access to the PostgreSQL, you’ll need to configure the existing VPC or create a new one, set it as the VPC for the ThingsBoard cluster, create security group for PostgreSQL, set them for node node-group in the ThingsBoard cluster and configure the access from the ThingsBoard cluster nodes to PostgreSQL using another security group.
You can find more information about configuring VPC for eksctl aqui.
Command to create AWS cluster:
1
eksctl create cluster -f cluster.yml
Step 3. Create AWS load-balancer controller
After the cluster is ready you’ll need to create AWS load-balancer controller. You can do it by following this guide.
Step 4. Amazon PostgreSQL DB Configuration
You’ll need to set up PostgreSQL on Amazon RDS. One of the ways to do it is by following this guide.
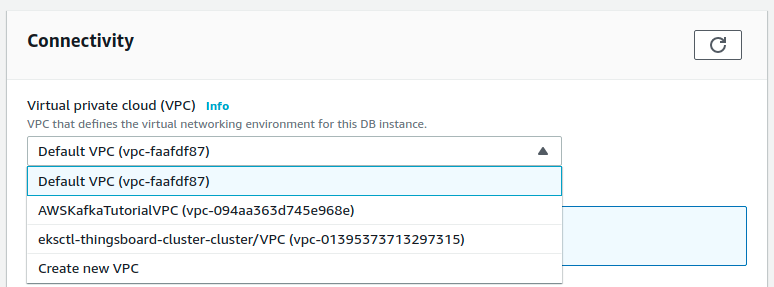
Note: Make sure your database is accessible from the cluster, one of the way to achieve this is to create the database in the same VPC and subnets as ThingsBoard cluster.
aqui you should choose VPC with the name of your cluster:
aqui you should choose security group corresponding to the one on the screen:

Note: in order to make PostgreSQL more secure you may create the separate security group,
configure access only to the 5432 port and from the ThingsBoard nodes.
This can be achieved if you assigned security group to the node node-group in the cluster.yml file.
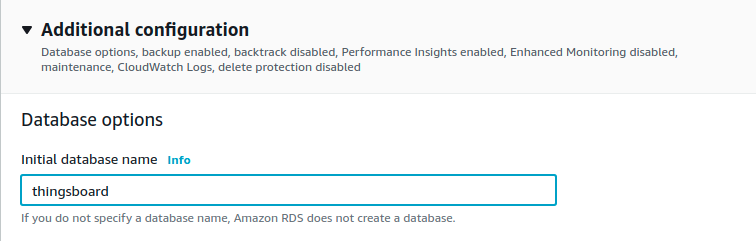
Make sure that thingsboard database is created along with PostgreSQL instance (or create it afterwards).
On AWS Console get the Endpoint of the RDS PostgreSQL and paste it to SPRING_DATASOURCE_URL in the tb-node-db-configmap.yml instead of your_url:
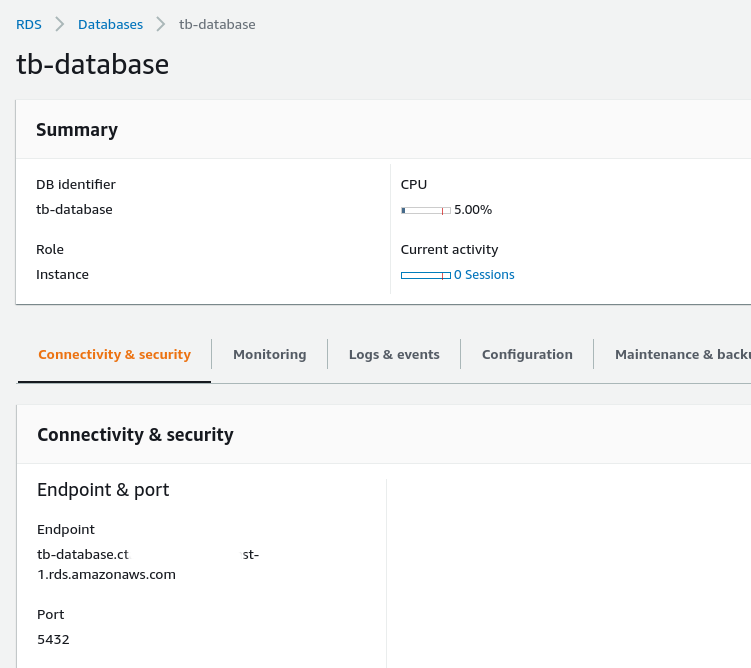
Also, you’ll need to set SPRING_DATASOURCE_USERNAME and SPRING_DATASOURCE_PASSWORD with PostgreSQL username and password corresponding.
Step 5. Upload Docker credentials
Make sure your have logged in to docker hub using command line. To upload Docker credentials, please execute next command:
1
./k8s-upload-docker-credentials.sh
Or you can use the following command:
1
kubectl create secret docker-registry regcred --docker-server=https://index.docker.io/v1/ --docker-username=$YOUR_USERNAME --docker-password=$YOUR_PASSWORD --docker-email=$YOUR_EMAIL
Step 6. Installation
Execute the following command to run installation:
1
 ./k8s-install-tb.sh --loadDemo
Where:
--loadDemo- optional argument. Whether to load additional demo data.
After this command finish you should see the next line in the console:
1
Installation finished successfully!
Otherwise, please check if you set the PostgreSQL URL in the tb-node-db-configmap.yml correctly.
Step 7. Configure secure HTTP connection
Note: if you don’t need SSL connection over HTTP, you’ll need to remove alb.ingress.kubernetes.io/listen-ports and alb.ingress.kubernetes.io/certificate-arn
lines in the routes.yml file and skip this step.
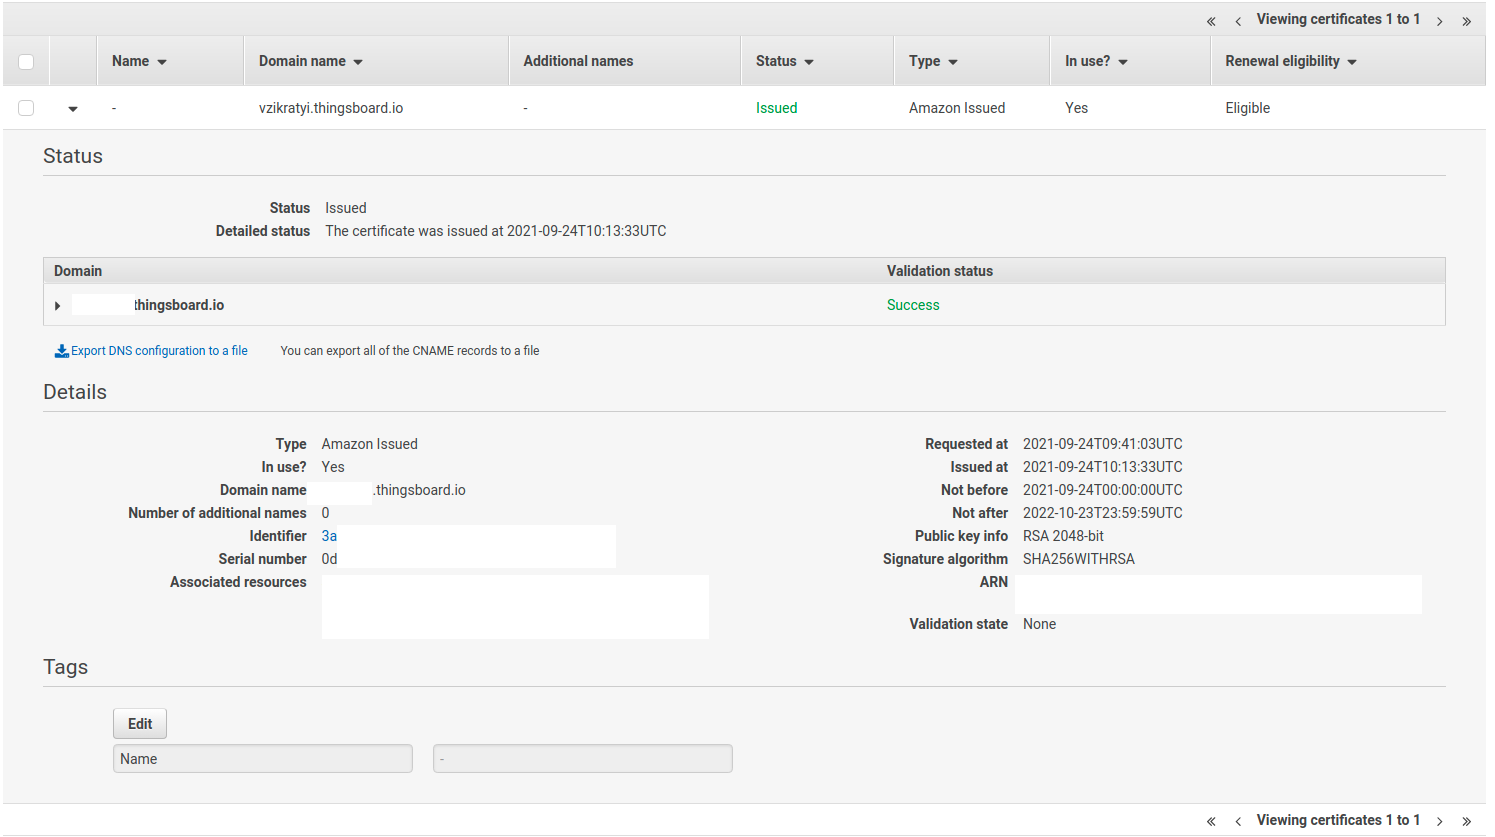
Use AWS Certificate Manager to create or import SSL certificate.
After creation/import you’ll need to copy certificate’s ARN and paste it instead of ARN_VALUE in the routes.yml file:
Step 8. Configure secure MQTT connection
Follow this guide to create a .jks file with the SSL certificate.
Afterwards, you need to set MQTT_SSL_KEY_STORE_PASSWORD and MQTT_SSL_KEY_PASSWORD environment variables in the tb-node.yml file
to the corresponding key-store and certificate key passwords.
You’ll need to create a config-map with your JKS file, you can do it by calling command:
1
2
kubectl create configmap tb-mqtts-config \
             --from-file=server.jks=YOUR_JKS_FILENAME.jks -o yaml --dry-run=client | kubectl apply -f -
where YOUR_JKS_FILENAME is the name of your .jks file.
Note: if you don’t need SSL connection over MQTT, you’ll need to set MQTT_SSL_ENABLED environment variable to false
and delete all notions of tb-mqtts-config in the tb-node.yml file.
Step 9. Starting
Execute the following command to deploy resources:
1
 ./k8s-deploy-resources.sh
After few minutes you may call kubectl get pods. If everything went fine, you should be able to
see tb-node-0 pod in the READY state.
Step 10. Using
Now you can open ThingsBoard web interface in your browser using DNS name of the load balancer.
You can see DNS name (the ADDRESS column) of the HTTP load-balancer using command:
1
kubectl get ingress
You should see the similar picture:

To connect to the cluster via MQTT or COAP you’ll need to get corresponding service, you can do it with command:
1
kubectl get service
You should see the similar picture:

There are two load-balancers:
- tb-mqtt-loadbalancer-external - for MQTT protocol
- tb-coap-loadbalancer-external - for COAP protocol
Use EXTERNAL-IP field of the load-balancers to connect to the cluster.
Use the following default credentials:
- System Administrator: sysadmin@thingsboard.org / sysadmin
If you installed DataBase with demo data (using --loadDemo flag) you can also use the following credentials:
- Tenant Administrator: tenant@thingsboard.org / tenant
- Customer User: customer@thingsboard.org / customer
In case of any issues you can examine service logs for errors. For example to see ThingsBoard node logs execute the following command:
1
kubectl logs -f tb-node-0
Or use kubectl get pods to see the state of the pod.
Or use kubectl get services to see the state of all the services.
Or use kubectl get deployments to see the state of all the deployments.
See kubectl Cheat Sheet command reference for details.
Execute the following command to delete tb-node and load-balancers:
1
./k8s-delete-resources.sh
Execute the following command to delete tb-node, load-balancers and configmaps:
1
./k8s-delete-all.sh
Execute the following command to delete EKS cluster (you should change the name of the cluster and zone):
1
eksctl delete cluster -r us-east-1 -n thingsboard-cluster -w
Upgrading
In case when database upgrade is needed, execute the following commands:
1
2
3
 ./k8s-delete-resources.sh
 ./k8s-upgrade-tb.sh --fromVersion=[FROM_VERSION]
 ./k8s-deploy-resources.sh
Where:
FROM_VERSION- from which version upgrade should be started. See Upgrade Instructions for validfromVersionvalues.
-
Getting started guides - Esses guias fornecem uma visão geral rápida dos principais recursos do RETINA. Projetado para ser concluído em 15-30 minutos.
-
Connect your device - Learn how to connect devices based on your connectivity technology or solution.
-
Data visualization - These guides contain instructions how to configure complex ThingsBoard dashboards.
-
Data processing & actions - Learn how to use Mecanismo de Regra RETINA.
-
IoT Data analytics - Learn how to use rule engine to perform basic analytics tasks.
-
amostras de hardware - Learn how to connect various hardware platforms to ThingsBoard.
-
Advanced features - Learn about advanced ThingsBoard features.
-
Contribution and Development - Learn about contribution and development in ThingsBoard.